Thank you for purchasing your PaddleBack SUP! Now let’s get paddling!
PaddleBack SUP Assembly Instruction Overview
1. Align the head and nose board
2. Insert the connector tubes
3. Slide board panels together
4. Latch
5. Add fin
6. Add leash
7. Adjust paddles to preferred length!
The PaddleBack SUP includes:
- Tail board and nose boards
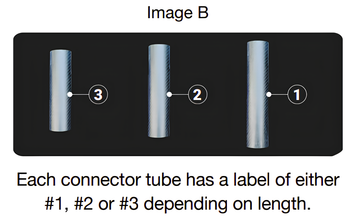
- 3 connector tubes (labeled #1, #2, #3)
- 1 paddle
- 1 leash
- 1 Fin
- 1 Fin screw and nut
- 1 travel bag

PaddleBack SUP Assembly Instructions
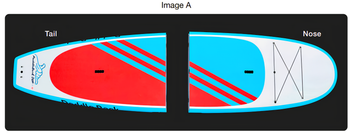
1. Align the Tail and Nose of the board as below
Find a flat space to assemble the paddle board. If you do not have a flat surface refer to Image H. Set the two board halves on a flat surface. Align Tail and Nose pieces as depicted in the image A below:
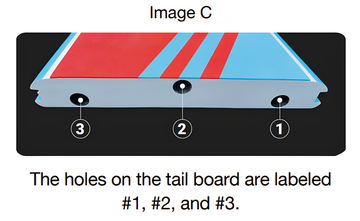
Grab the three labeled carbon fiber tubes from the travel bag pouch. Take note of the labels on the connector tubes (image B) and the labels on the inside of the tail board (image C).
2. Insert Carbon Fiber Tubes
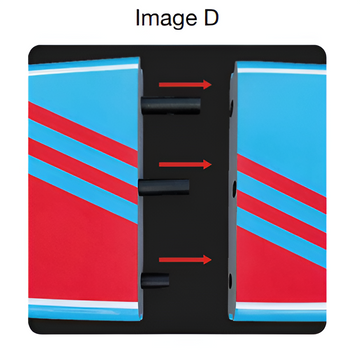
Insert the tubes into their designated holes on the edge of the tail board (image D)
Important:
The tubes are not interchangeable and must be placed in the designated hole.
3. Slide the two halves together
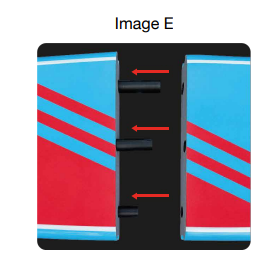
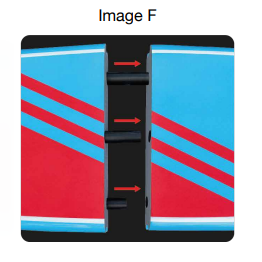
While the boards are still lying flat on the ground, use the finger inserts to slide the two halves towards each other (image E), until the longest tube touches the nose board (image F).
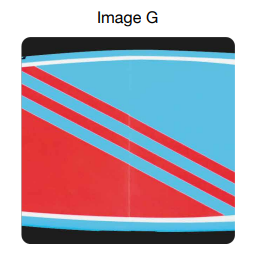
Then align the long tube with #1 hole on the nose board, guide the tube into the hole and then slide the rest together (image G).
Helpful Hint:
It is best to assemble the board on a flat surface, free of sand or grass.However, if you do not have a flat surface, no worries. Insert the carbon fiber tubes into their proper holes on the tail half of the board. Put the board on the uneven ground and guide the nose of the board into the Tube #1 first, then Tube #2. Once the nose of the board has been guided into Tube #1 & #2, stand the board upright as shown in image H and slide the nose of the board down.
4. Latch Board Together
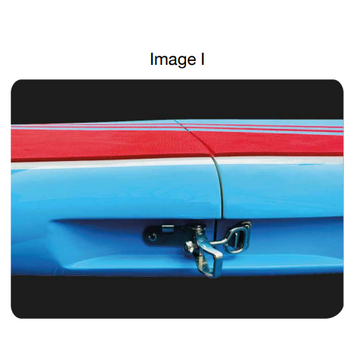
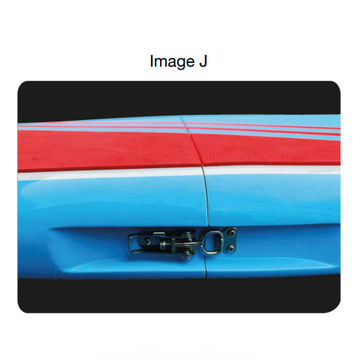
Secure the two halves together by latching both sides. The latch is adjustable for your convenience. We recommend having mild pressure when you are latching. You do not want it to be very hard to latch. That means it is too tight. If you have the latch too tight, you risk damaging the board. When latched properly, you will hear a light click. This means that your board latch is secure.
5. Add a fin!
Insert the fin as shown in image K.
a. Place the fin screw nut in the upper fin box track
b. Place the tail end of the fin in the track
c. Push the front of the fin down to match the fin nut hole
d. Screw fin screw into the fin nut until tight
e. Give a pull on the fin to make sure the fin is secure
The fin placement can be adjusted to your liking!
Adjusting the fin will adjust how quickly you turn the board when paddling. This can be adjusted for different paddling conditions as well.

6. Add the leash
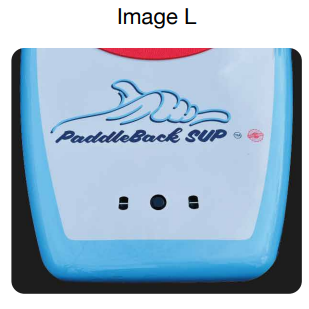
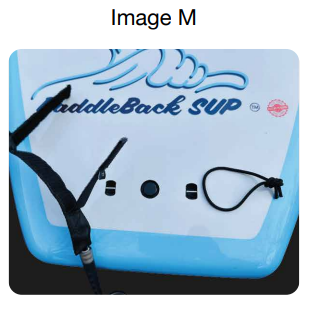
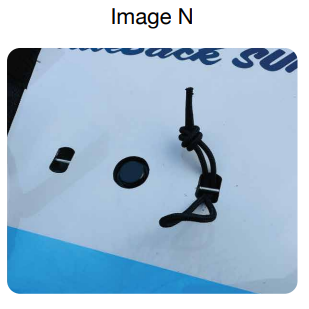
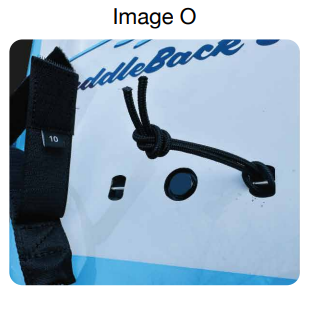
1. There are two different holes to attach your leash, depending if you are right foot or
left foot dominant. The black hole in the middle of the two leash attachments is a
breathing hole. Do not attempt to remove this.
2. Un velcro the leash and remove the connector string.
3. Slide connector string through your preferred leash hole.
4. Slide the looped end over the knotted end and pull until snug.
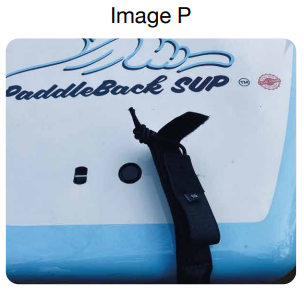
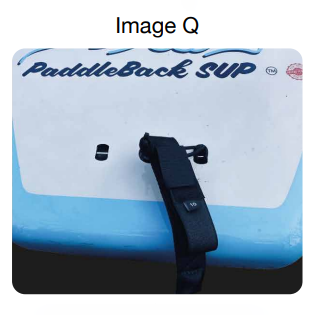
5. Velcro the end of the leash through the connector string.
6. Make sure Velcro is pushed flat to prevent from coming undone.
7. Assemble paddle
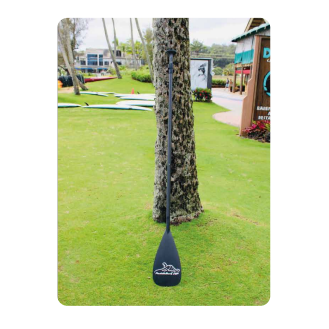
Slide the two paddle pieces together. Listen for a light click when it is secure. Adjust for height.

Transporting the PaddleBack SUP
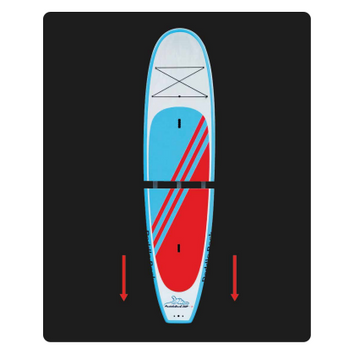
When done paddling and you are ready to transport your board. Make sure your latch is pointed to the tail end of the board and you secure the latch as shown in image. This will prevent damage to the latch while it is in the bag.
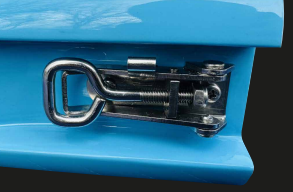
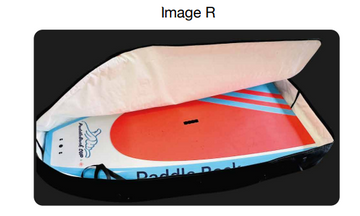
Image R - Inside the bag, you will see a divider between the two boards. This is meant to prevent rubbing or scratching while transporting the board.
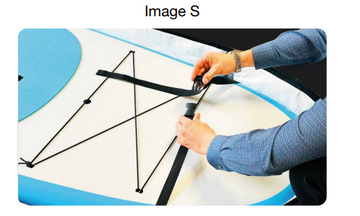
Image S - There are two straps inside the bag that you will clip together to ensure your board is secure when traveling.
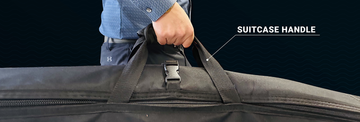
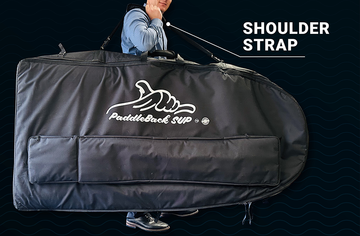
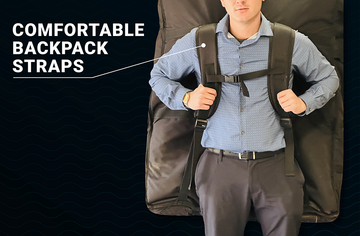
How To Carry Your PaddleBack SUP
There are three featured ways to carry your paddle board when transporting it. See pictures below.
Warnings
PaddleBack SUP strongly recommends the use of a U.S Coast Guard approved personal flotation device. Before using your paddle board, be sure to check your local regulations to familiarize yourself with any rules or regulations.
Paddling with a partner is better than paddling alone.
Be sure to inspect your board and your equipment before and after use.
Children should not paddle board without adult supervision and the right U.S Coast Guard approved personal flotation device.
Do not leave the board exposed to direct sunlight for extended periods of time as the sun's UV rays may cause damage.
Do not modify the board or use it for anything other than its intended use; doing so will void any warranty.
Always exercise safe boarding by paying attention to weather and water conditions. Do not attempt actions which are beyond your skill level.
If you have a medical condition that might affect you to paddle safely, please consult a medical professional before going out.
Do not use while impaired or under the influence of intoxicants such as alcohol, drugs, or medication. Happy Paddling!
Disclaimer
The user of this product assumes all risks of any personal injury, property damage, or death and hereby releases PaddleBack SUP and/or DockMasterLLC of any and all liability. Do not leave children unattended while in use. Always Pay attention to weather and water conditions. Do not use this product in conditions which are dangerous. Things such as weather factors, water currents, rip tides, natural hazards, and man-made
hazards should be considered dangerous and treated with caution. Do not use it when impaired. This product is not intended for use as a lifesaving device. Keep a safe distance from moving boats or other water activities that could affect wave conditions.Only use this product if you are a competent swimmer and always use a U.S Coast Guard Approved Personal Flotation Device.
By using this paddle board and its accessories, you acknowledge that you have read and understand these warnings and accept the associated risks.
After Us
1) Detach the main fin by unscrewing the thumb screw.
2) Unlatch both side latches on the (side) rail of the boards.
3) Place fingers into finger slots in the middle of the board and pull the two halves apart.
4) Once the two halves are separated, you can remove the carbon fiber tubes. The tubes have their own outside compartment on the bag.
5) We recommend washing the board off after use to maximize your board's life expectancy.
6) When putting your board into the bag, use the divider in the bag to separate your two halves.
7) There are two straps in the bag that are adjustable to secure the board in the bag to prevent the board from moving around in the bag during transport.
Care and Maintenance
With a basic amount of care and attention, you should get many years of enjoyment with your PaddleBack SUP.
Always keep your board in a shaded area when not in use. Do not leave your deck pad exposed and facing the sun. Avoid frequent temperature fluctuations.
Rinse your board off after use.
